
-

Email Us
sale@lscmagnetics.com -

Contact Number
+86 -13559234186
Email Us
sale@lscmagnetics.comContact Number
+86 -13559234186

Comprehensive Guide to Common Wire-Related Issues with Rebar Tying Machines
Aug 11, 2026On modern construction sites, rebar tying machines have become indispensable for boosting productivity and reducing physical labor. Yet in practice, wire-related issues frequently disrupt workflow and compromise tie quality. This guide walks through the most common wire problems encountered with rebar tying machines—and offers practical, field-tested solutions to help crews avoid costly delays.
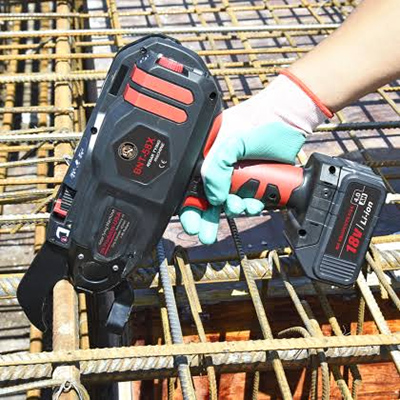
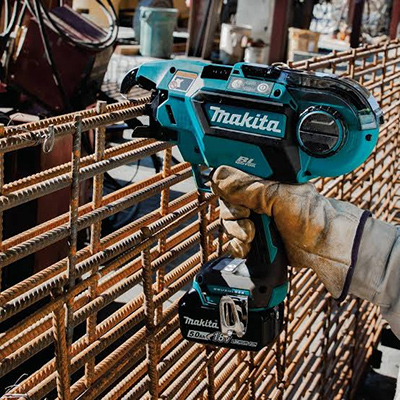
Symptoms: The machine runs but feeds no wire; or wire gets stuck in the feed channel, accompanied by intermittent alarm beeps.
Root Causes:
| Cause | Typical Signs |
| Improper reel installation | Reel mounted backward, loose coils, or tangled wire |
| Incorrect wire gauge | Wire too thick or too thin for the machine's spec |
| Debris in the feed path | Dust, rust flakes, or concrete residue clogging the guide groove |
| Damaged wire surface | Kinks or flattening from rough handling or storage |
Solutions:
Verify reel setup – Confirm the reel is seated correctly in the hopper, with the wire paying out in the proper direction. If coils are loose, rewind or replace the reel.
Use compliant wire – Different machine models have strict diameter requirements. Most automatic binders use 0.8 mm wire, while MAX-series tools require dedicated reels such as TW898 (No. 21) or TW1061T (No. 19) —ordinary hand-tying wire will not work.
Clear the feed path – Wipe the feed rollers, guide tube, and cutter head regularly with a dry cloth or blow them out with compressed air. Keep the machine out of rain to prevent rust and premature gear wear.
Adjust your approach angle – Hold the tool at roughly 45° to the bar intersection, inserting it squarely. This prevents the wire from deflecting off the rebar or missing the exit track.
Symptoms: Wire snaps at the twist point during binding, or the finished knot comes loose and fails to hold.
Root Causes:
Poor wire temper – Non-annealed, hard-drawn wire is brittle and breaks easily under torsion. Quality tying wire should be annealed low-carbon steel for adequate ductility.
Wrong diameter – Wire that's too thin (< 0.8 mm) can't handle the torque needed for larger bars; wire that's too thick overloads the motor or snaps from excessive force.
Rebar size out of range – Each machine has a recommended bar diameter range (e.g., 12–58 mm). Outside that range, the wire cannot wrap securely.
Rust or localized work-hardening – Poor storage causes corrosion, and repeated bending during handling creates weak spots that fail during twisting.
Solutions:
Always use annealed soft wire – Check the packaging for annealing treatment. A simple bend test is telling: good wire survives multiple repeated bends without cracking.
Match wire gauge to bar size – As a rule of thumb, #3–#5 bars (10–16 mm) pair with #16 (1.6 mm) wire; smaller bars can use #18–#22. For automatic binders, stick rigidly to the manufacturer's diameter spec.
Adjust torque settings – If your machine allows torque adjustment, dial it down slightly when working with thicker rebar to avoid over-twisting.
Discard rusty wire – If rust spots are visible, clean light surface rust with a wire brush; replace the reel if corrosion is severe.
Symptoms: Completed ties wobble visibly; wire loops are slack and fail to secure the bars.
Root Causes:
Too few wraps – Wrap count is program-controlled. If the fed wire length is insufficient, the number of wraps drops.
Wire spring-back – Excessively stiff wire tends to unwind slightly after twisting, loosening the joint.
Off-center positioning – The machine misses the center of the bar intersection, causing uneven tension distribution.
Tail wire pointing outward – The cut end protrudes in a direction that gets knocked loose during subsequent construction.
Solutions:
Check wire length per roll – Different machine models yield different numbers of ties per roll (e.g., 100 joints/roll). Replace the reel before it runs completely empty to avoid weak tail-end ties.
Keep the tool vertical – Align the machine squarely with the bar intersection. If the wire deflects off the bar, it will form a loose curl—adjust your angle and try again.
Add manual reinforcement – For critical joints or large-diameter bars, supplement automatic ties with additional hand-tied wraps or use heavier-gauge wire.
Mind the tail orientation – After each tie, check that the cut end does not point toward the outside edge, where it's prone to snagging. Use a tying hook to snug it down if needed.
Symptoms: After completing one tie, the machine keeps feeding wire and wraps repeatedly around the same joint.
Cause: This is almost always an operator technique issue—either the trigger isn't released promptly, or the tool is triggered again before being lifted off the bar.
Solutions:
Release the trigger immediately after each tying cycle, and lift the machine clear before starting the next tie.
If over-wrapping occurs, cut away the excess wire with diagonal cutters and remove any leftover bits stuck at the outlet.
Emphasize proper rhythm during operator training: "one tie, one lift."
Symptoms: Even with seemingly normal wire, the machine jams or breaks wire frequently, or tie quality is inconsistent.
Key Insight:
Automatic rebar tiers are far more sensitive to wire quality than hand tying. Wire is not just a consumable—it's a critical system component that must meet exacting standards:
Consistent diameter – Variations affect roller grip and feed accuracy.
Smooth surface – Rough wire increases feed resistance and jam frequency.
Uniform reel winding – Uneven layers cause tension spikes and feeding hiccups.
Stable elongation – Ensures uniform wrap counts and tie strength from joint to joint.
Solutions:
Use original or approved compatible reels – MAX-series tools require dedicated reels; bulk hand-tying wire is not interchangeable.
Don't mix batches – Different production batches can vary in hardness and diameter, confusing the machine's timing and torque.
Test before full deployment – When trying a new wire batch, run 10–20 test ties to verify smooth feeding and secure knots. Incompatible wire can cut operating speed by 20% or even damage the tool over time.
| Issue | Consequence |
| Stored outdoors, exposed to moisture | Rust formation leads to brittleness and breakage |
| Contact with corrosive chemicals | Surface pitting, weakened sections |
| Rough transport / dropped coils | Kinks, flat spots, localized deformation |
| Long-term storage without protection | Gradual oxidation, surface dust buildup |
Storage Best Practices:
Keep it dry – Store wire reels in a dry, ventilated area, away from open air. Cover with a tarp when necessary.
Minimize bending – Even annealed wire work-hardens with repeated flexing. Handle carefully during transport—no throwing from height.
Rotate stock – Use the FIFO (first-in, first-out) principle to prevent long-term aging.
Inspect before use – For wire stored more than a few months, check surface condition and wipe off any dust or light rust with a clean cloth.
To keep wire-related issues to a minimum, make these checks part of your daily startup and shutdown routine:
□ Clean the feed channel, cutter head, and rollers
□ Verify the reel is correctly installed and has enough slack for smooth feeding
□ Confirm the wire gauge matches the machine's requirements
□ Check battery level—low voltage weakens feed force and torsional power
□ Inspect cutter blade sharpness; replace or dress if dull
□ Run 2–3 test ties before starting production to confirm consistent quality
Wire problems with rebar tying machines might seem minor, but they have an outsized impact on both productivity and structural quality. The takeaway is straightforward: choose the right wire, install it correctly, keep the tool at the right angle, clean regularly, and store properly.
An automatic rebar tier is a precision system—and the wire, as its key consumable link, must match the machine in quality, specs, and condition. When the man-machine-material triad works in harmony, the rebar tier delivers its full potential: faster work, less fatigue, and consistently sound rebar connections.
Pro Tip: If the machine still acts up after going through all the steps above, call the manufacturer's service team. Don't try to tear down the machine yourself—you risk causing more harm than good.
Whatsapp : +86 -13559234186
Email : sale@lscmagnetics.com
Tel : +86 -13559234186